Step-by-Step: Editing an Image
Example: Adding Sunglasses to a Portrait
Let's walk through a complete editing workflow:
Step 1: Open the Edit Tool
- • Select an image from your gallery
- • Click the Edit button
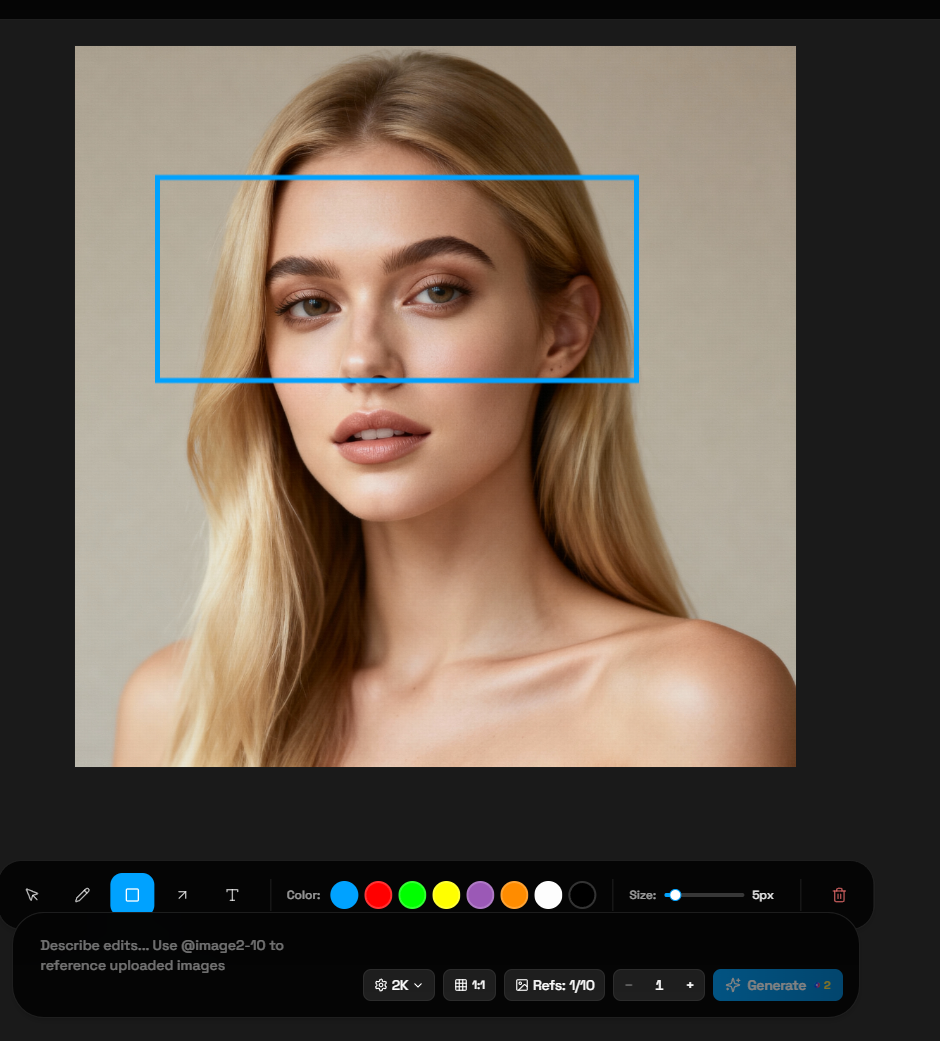
Step 2: Select Your Drawing Tool
- • Click the Box tool (or Draw tool for freehand)
- • Choose a color from the palette (red works well for visibility)
Step 3: Mark the Area to Edit
- • Draw a box or mark around the area you want to modify
- • In this example, mark the eye area where sunglasses should appear
Tips for Marking:
- • Be precise but don't worry about perfection
- • Mark slightly larger than the target area
- • Use contrasting colors for visibility
- • Multiple marks are allowed for complex edits
Step 4: Describe Your Edit
- • In the prompt field, type your editing instruction
- • Example: "Add sunglasses"
- • Be specific and clear about what you want
Good Prompts:
- • "Add black sunglasses"
- • "Change background to beach sunset"
- • "Add red lipstick"
- • "Remove background"
Avoid Vague Prompts:
- • "Make it better" - too subjective
- • "Change something" - not specific enough
- • "Fix it" - unclear intent
Step 5: Set Your Preferences
- • Resolution: Choose 2K (High) or 4K for best quality
- • Aspect Ratio: Keep original or change as needed
- • Number of Variations: Generate 1-4 edited versions
Step 6: Generate the Edit
- • Click the Generate button (costs 2 credits per image)
- • Wait for processing (typically 10-30 seconds)
- • Review your edited images
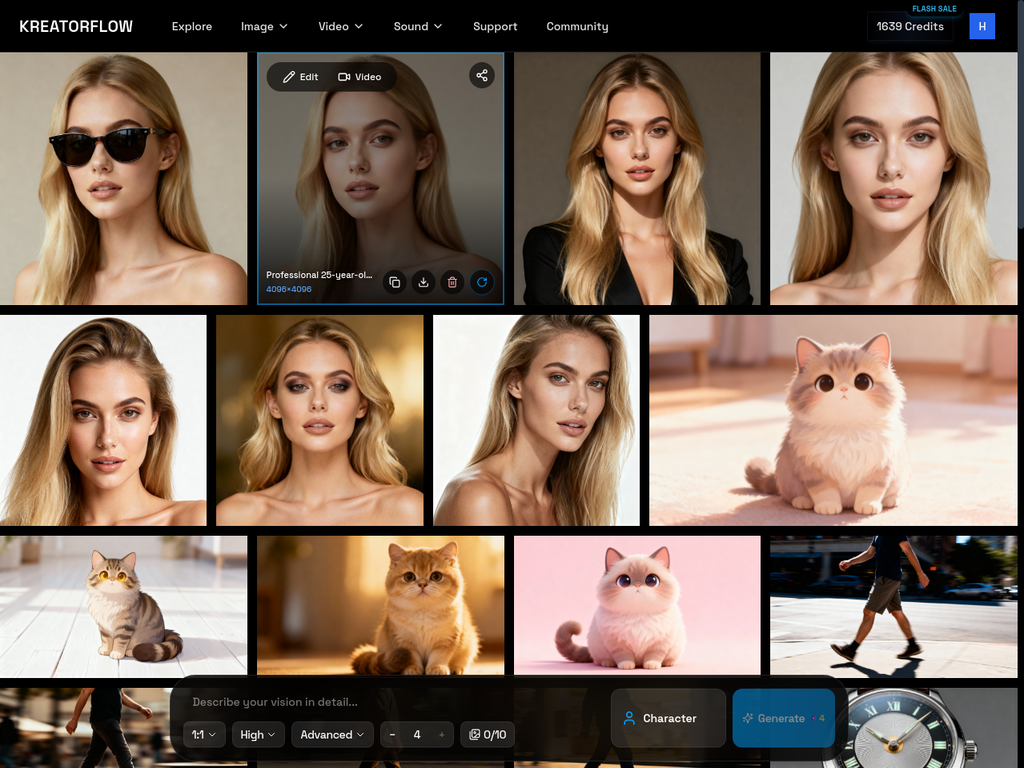
Result: The AI successfully added stylish sunglasses to the portrait, maintaining the natural look and lighting of the original image!
Drawing Tools Explained
1. Select Tool (Arrow Icon)
Purpose:
Move and adjust existing markings
Use:
Click and drag to reposition marks
Best For:
Correcting placement after drawing
2. Draw Tool (Pen Icon)
Purpose:
Freehand drawing and marking
Use:
Click and drag to draw freely on the image
Best For:
Irregular shapes, precise outlining, custom marks
3. Box Tool (Rectangle Icon)
Purpose:
Draw rectangular selection boxes
Use:
Click and drag to create a rectangle
Best For:
Marking faces, objects, rectangular areas
4. Arrow Tool
Purpose:
Draw directional arrows
Use:
Click and drag to create arrows pointing to areas
Best For:
Indicating specific points or directions
5. Text Tool (T Icon)
Purpose:
Add text labels to your markings
Use:
Click to place text on the canvas
Best For:
Adding notes or labels to complex edits
Color Palette
Choose from 8 colors to mark different areas:
- • Blue, Red, Green, Yellow - High visibility colors
- • Purple, Orange - Alternative highlighting
- • White, Black - Contrast options
Tip: Use different colors to mark multiple edit areas in one session!
Workflow Summary
Quick Reference:
- Open → Select image and click Edit button
- Mark → Use drawing tools to mark the area to edit
- Describe → Enter clear, specific editing instructions
- Configure → Set resolution, aspect ratio, and number of variations
- Generate → Click Generate (2 credits per image)
- Review → Check results and download or iterate
Ready to Try It?
See real-world examples and learn best practices for professional results.