Create Your First AI Character
Complete step-by-step tutorial to create, save, and reuse AI characters. Follow these 5 steps to generate consistent characters that maintain the same facial features across unlimited image and video generations.
Generate Your Base Face Image
First, you need to generate a high-quality portrait image in the regular Image Generation section.
Navigate to Image Generation:
- 1.Go to Image menu in the top navigation
- 2.Click Generate AI Images
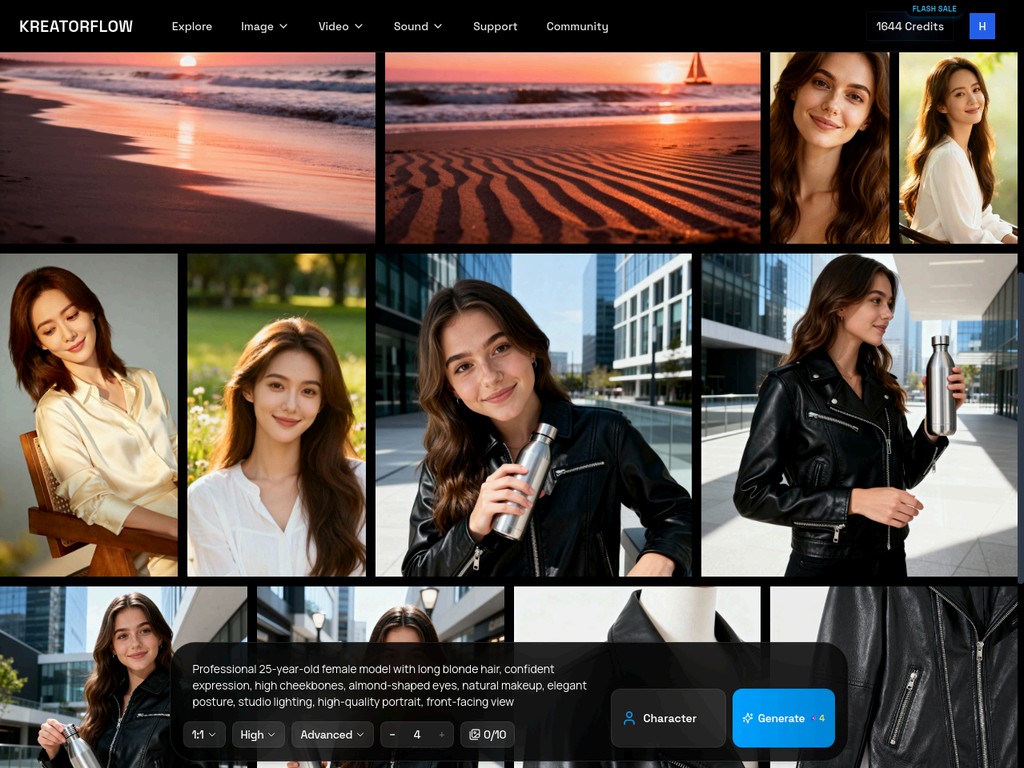
Enter a Detailed Portrait Prompt:
For our example, we'll create "Sophia Martinez," a 25-year-old professional model:
Professional 25-year-old female model with long blonde hair, confident expression, high cheekbones, almond-shaped eyes, natural makeup, elegant posture, studio lighting, high-quality portrait, front-facing view
Important:
You should be in the regular Image Creator page as shown above, NOT in any character workspace. The interface should show "Image Creator" at the top with standard generation options, and NO character name.
Generate the Image:
- •Enter your prompt in the text field
- •Click Generate button (costs 4 credits for batch of 4 images)
- •Wait for 4 images to be created
- •Review all images and identify the best one with a clear, front-facing view of the face
Download Your Best Image
Once you've identified the perfect base image:
Download the Image:
- 1.Click on the image to open it in the viewer
- 2.Click the Download button at the bottom
- 3.The image will be saved to your computer
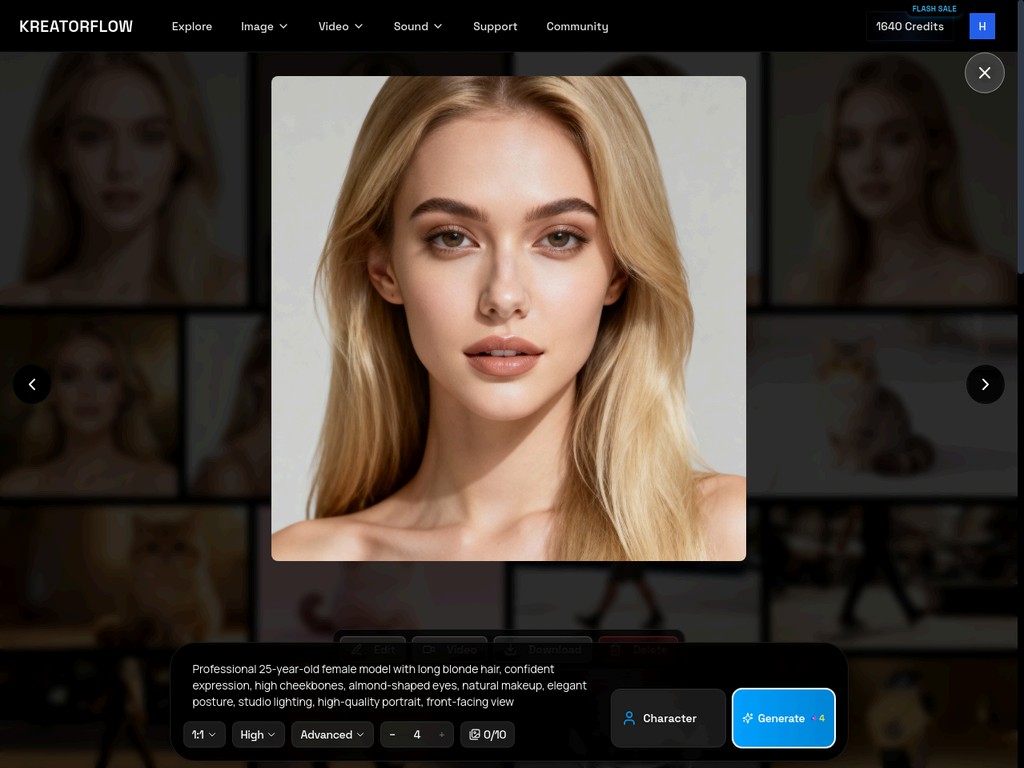
Important: Make sure the image shows:
Clear, front-facing view
of the face
Good lighting
on facial features
Minimal obstructions
no sunglasses, masks, or heavy shadows
Neutral expression
or natural smile
Navigate to Create AI Character
Now you'll create the character using your downloaded image.
Go to AI Characters Section:
- 1.Click Image menu in the top navigation
- 2.Select Create AI Character from the dropdown
- 3.Click the + Create New Character button
This opens the Create New Character dialog.
What You'll See:
- •Character Name field
- •Face Image upload area
- •Gender, Age, Hair Color, Hair Style dropdowns
- •Body Type and Ethnicity options
- •Additional Character Details text area
- •Cancel and Create Character buttons
Upload Face Image and Fill Details
Upload Your Face Image:
- 1.Click the Upload Face Image area (or drag and drop)
- 2.Select the image you downloaded in Step 2
- 3.Wait for the upload to complete
Empty Character Creation Dialog
Filled Character Details
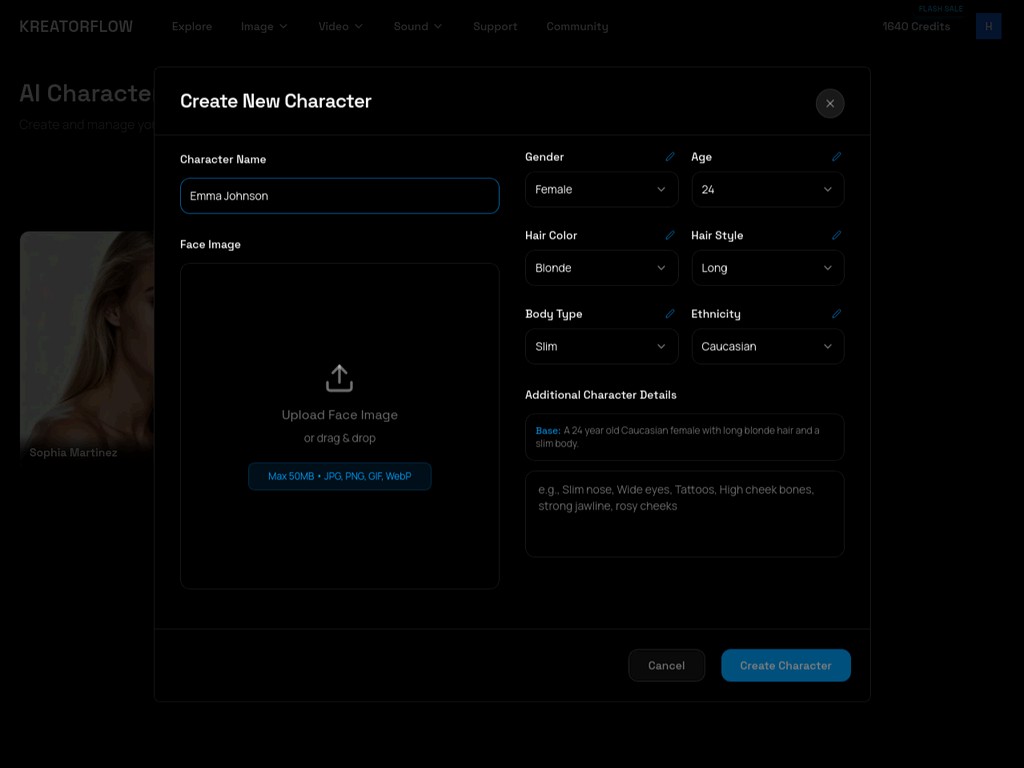
Fill Out Character Information:
| Field | Value | Purpose |
|---|---|---|
| Character Name | Sophia Martinez | Character identifier |
| Face Image | Upload your image | Reference image for AI |
| Gender | Female | Character attribute |
| Age | 25 | Character attribute |
| Hair Color | Blonde | Optional detail |
| Hair Style | Long | Optional detail |
| Body Type | Slim | Optional detail |
| Ethnicity | Caucasian | Optional detail |
| Additional Details | (Optional) | Extra characteristics |
Click Create Character to save.
Example Character Details:
- Name: Emma Johnson
- Gender: Female
- Age: 25
- Hair Color: Blonde
- Hair Style: Long
- Body Type: Slim
- Ethnicity: Caucasian
Character Successfully Created
Your character is now saved and ready to use!
You'll see it in your AI Characters library.
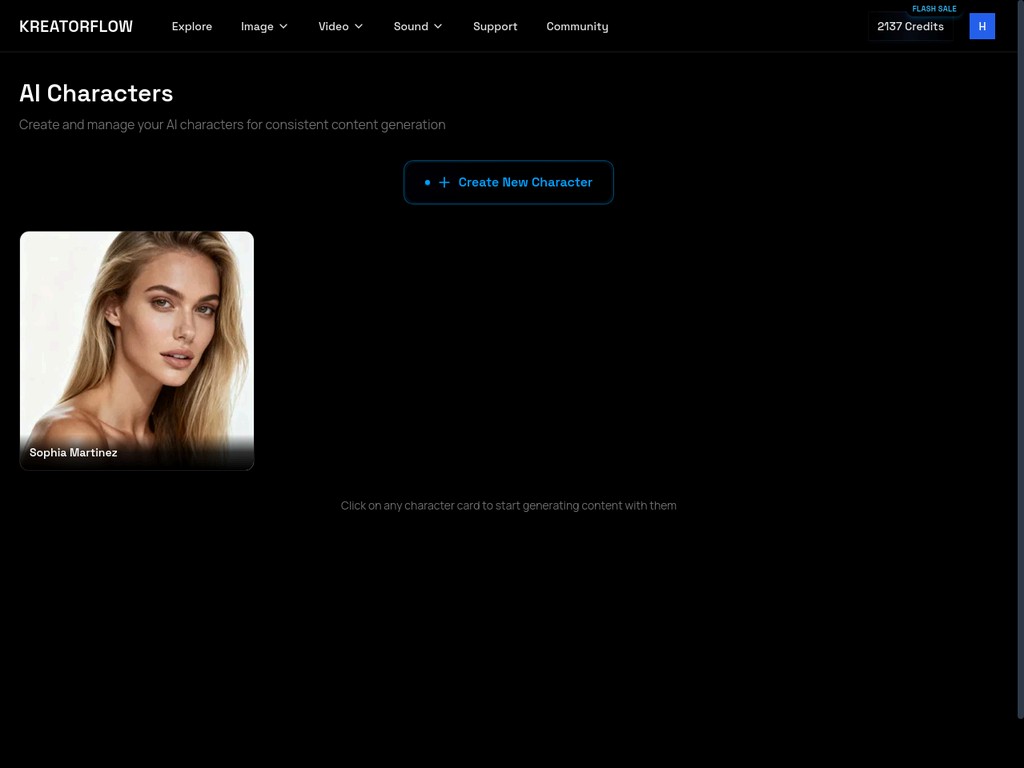
What You'll See:
- Your new character card with the face image
- Character name displayed on the card
- Edit and Delete buttons on the card
- "Create New Character" button to add more characters
- Click on any character card to start generating content with them
Next Steps:
Click on your character card to open their dedicated workspace where you can generate unlimited images with consistent facial features!
Pro Tip: The character's facial features remain consistent while the scenario changes - perfect for building a recognizable brand presence!
Ready to Use Your Character?
Now that your character is created, learn how to generate images and use them across different scenarios.