Reference Images for Character Consistency
This is one of Kreatorflow's most powerful features - the ability to use reference images to maintain consistent characters, styles, or elements across multiple generations.
How Reference Images Work
Upload References
Click "Reference Images (0/10)" to open the upload modal
Add Images
Upload up to 10 reference images
Reference in Prompt
Use @image1, @image2, etc. in your prompt
Generate
The AI will maintain consistency with your references
Example 5: Single Reference for Character Consistency
Use Case: Maintaining character consistency across different scenes and contexts using reference images.
Step 1: Open Reference Images Upload Modal
Click on the "Reference Images (0/10)" button in the control panel to open the upload interface.
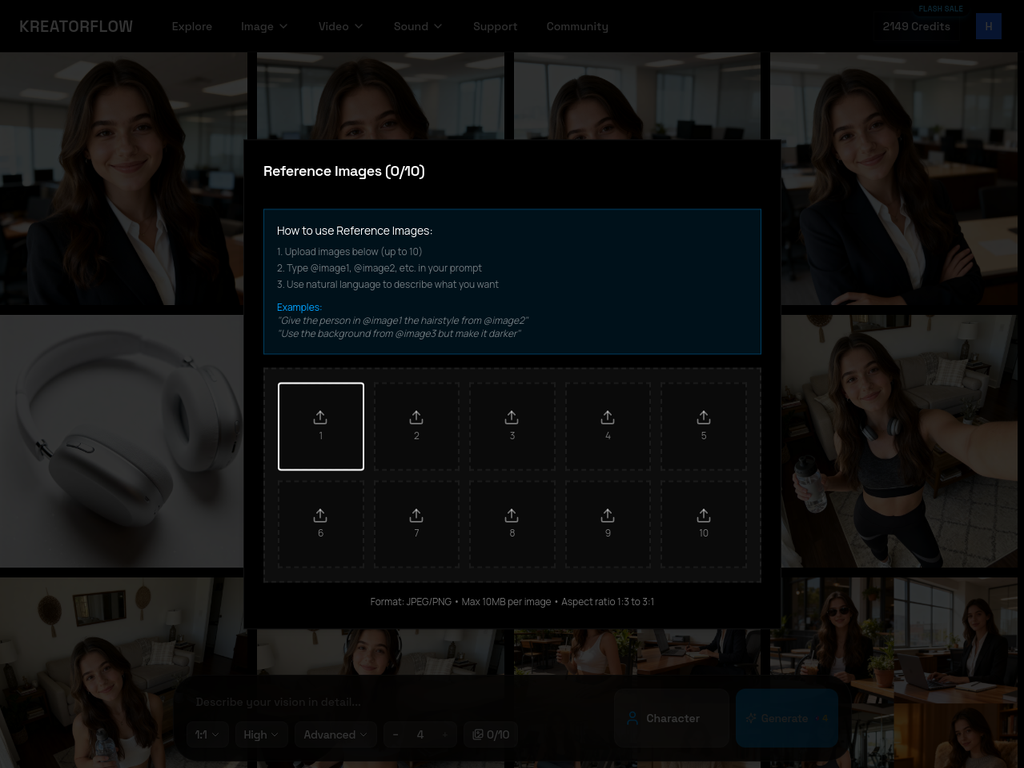
The modal shows:
- 10 upload slots (numbered 1-10)
- Instructions on how to use reference images
- Examples: "Give the person in @image1 the hairstyle from @image2"
- Format requirements: JPEG/PNG, Max 10MB per image, Aspect ratio 1.5 to 3:1
Step 2: Upload Your Reference Image
Click on slot 1 and upload your reference image. For this example, we'll use one of the casual selfie images from Example 4.
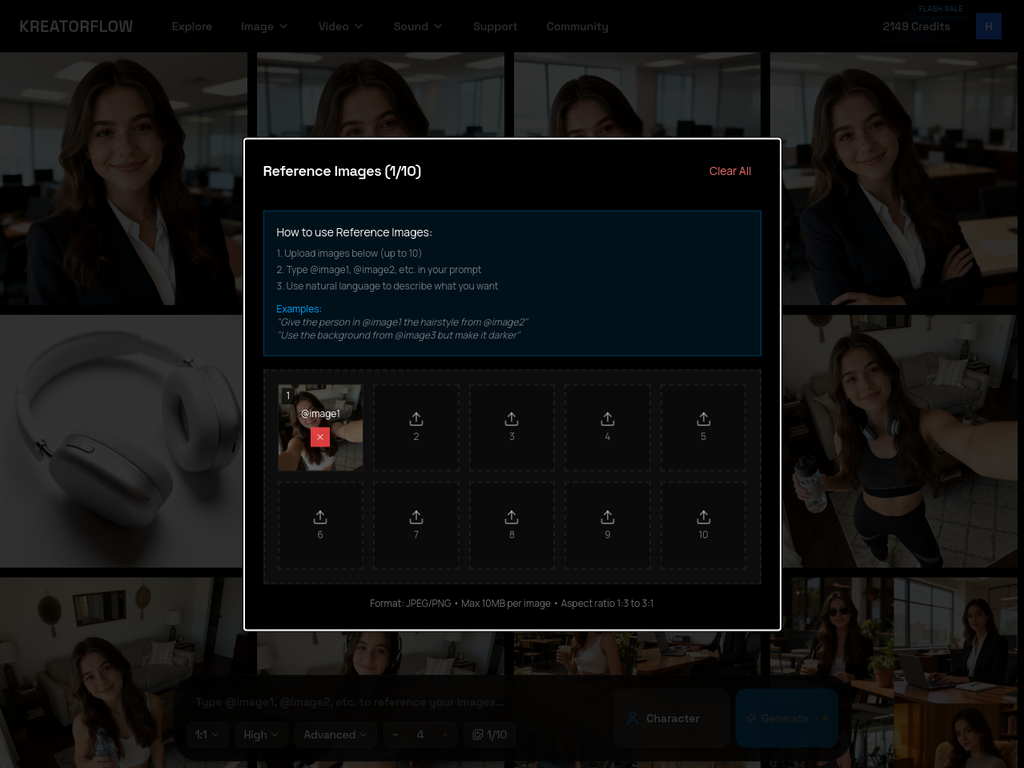
Notice:
- The uploaded image appears in slot 1 with a preview
- The counter changes from "0/10" to "1/10"
- A "Clear All" button appears to remove all references
- The image is now ready to be referenced as @image1 in prompts
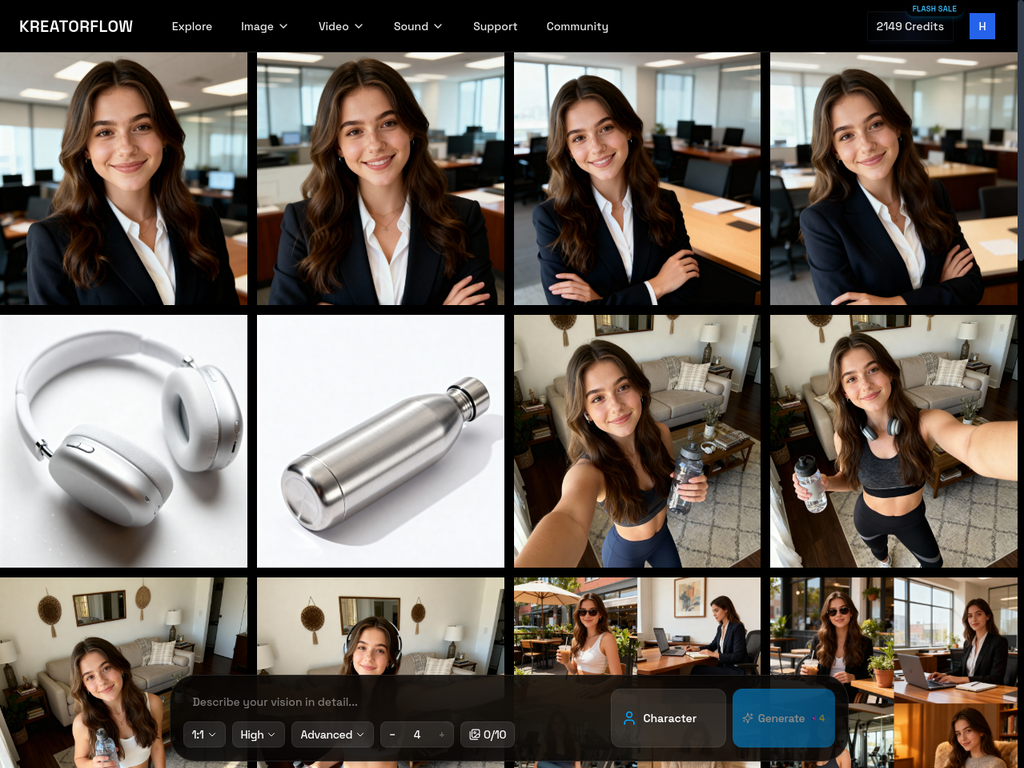
Step 3: Enter Prompt with Reference Syntax
Close the modal and enter your prompt using the @image1 syntax to reference the uploaded image.
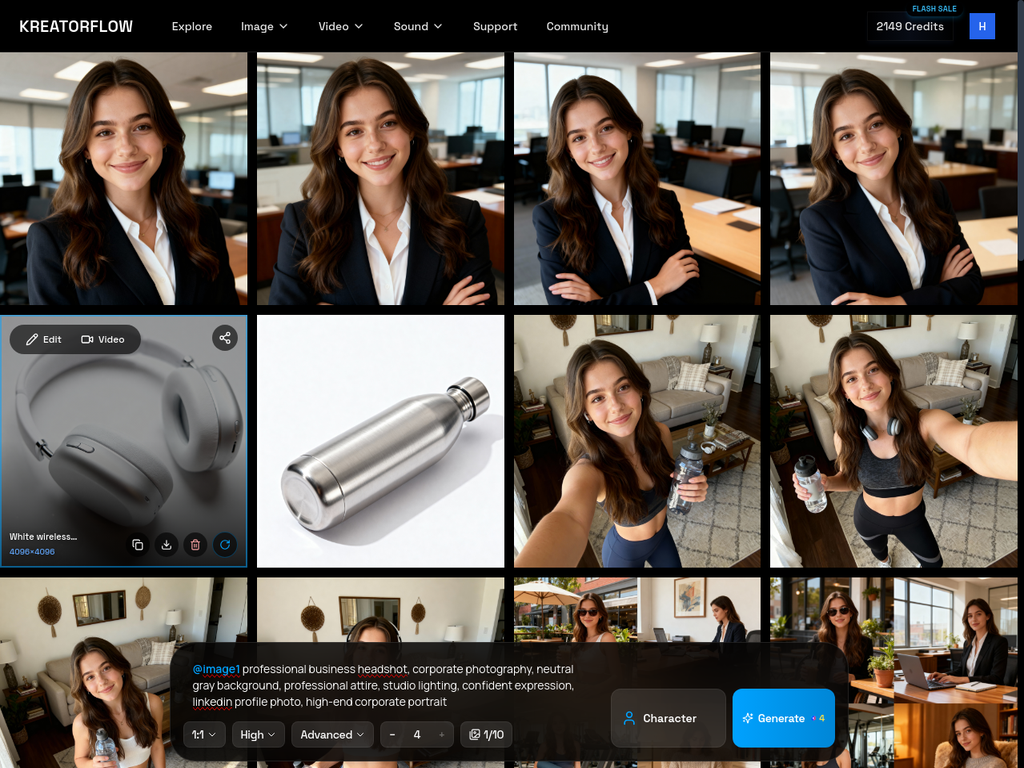
Prompt Used:
@image1 professional business headshot, corporate photography, neutral gray background, professional attire, studio lighting, confident expression, linkedin profile photo, high-end corporate portraitNotice how @image1 is highlighted in purple/pink, indicating it's recognized as a valid reference.
Step 4: Compare Reference and Results
Here's the original reference image compared with the generated results:
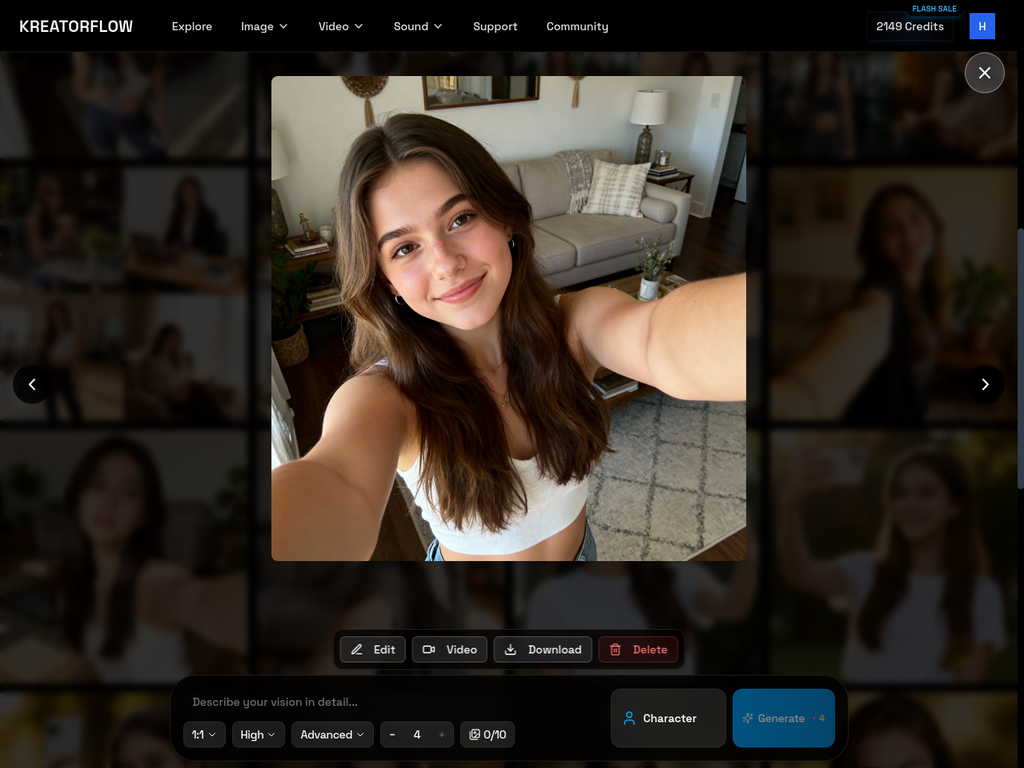

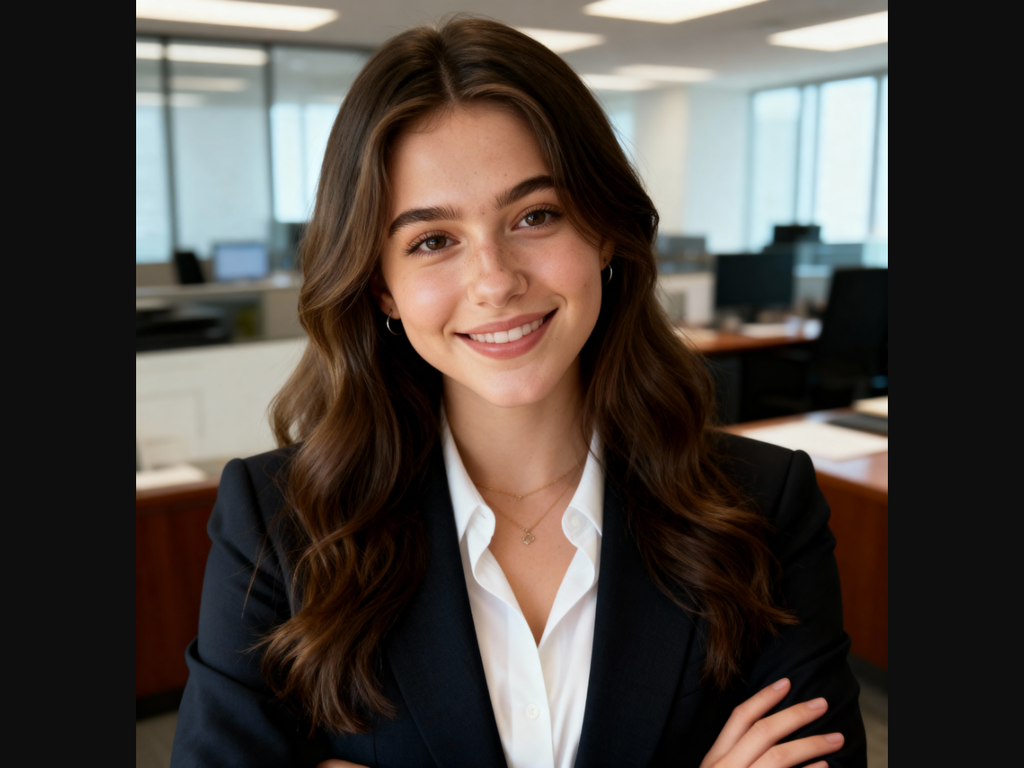
Character Consistency Achieved:
- Same facial features, hair color, and overall appearance
- Different setting: casual living room → professional office
- Different attire: casual crop top → professional business suit
- Different lighting: natural window light → studio lighting
What This Example Demonstrates:
- Character Consistency: Same person from casual selfie to professional headshot
- Context Transformation: Changed setting, lighting, and clothing while keeping the person
- Single Reference Usage: How to use @image1 to reference one image
Example 6: Multiple Reference Images
Use Case: Combining multiple reference images for product photography and lifestyle content by blending a model, specific clothing items, and accessories.
Scenario:
You want to create professional lifestyle photography that combines:
- The model/person from one image (@image1)
- A specific clothing item (like a jacket) from another image (@image2)
- A specific product/accessory (like a water bottle) from a third image (@image3)
Real-World Application: Perfect for e-commerce, product catalogs, influencer marketing, and brand campaigns.
Step 1: Upload Multiple References
Click on the Reference Images (0/10) button to open the upload modal, then upload your reference images to different slots.
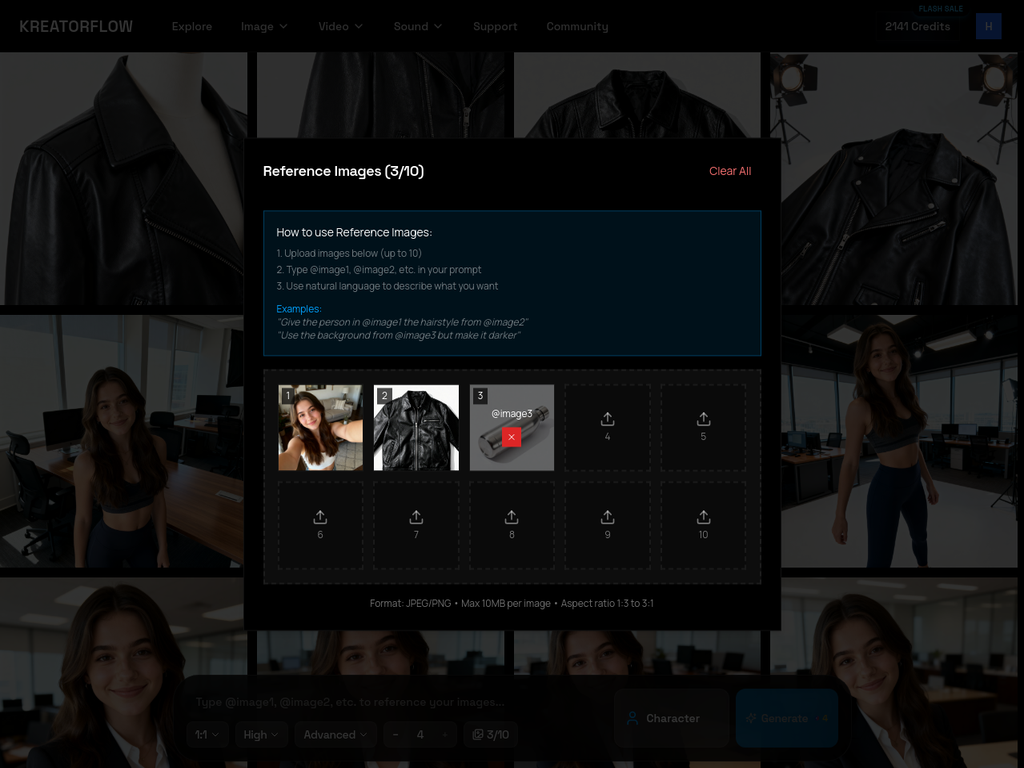
Our Three References:
- Slot 1 (@image1): Casual selfie - the model/person for character consistency
- Slot 2 (@image2): Black leather jacket - the specific clothing item to apply
- Slot 3 (@image3): Stainless steel water bottle - the specific product/accessory to include
Step 2: Enter Multi-Reference Prompt
Close the modal and enter a prompt that references all three images using @image1, @image2, and @image3 syntax:
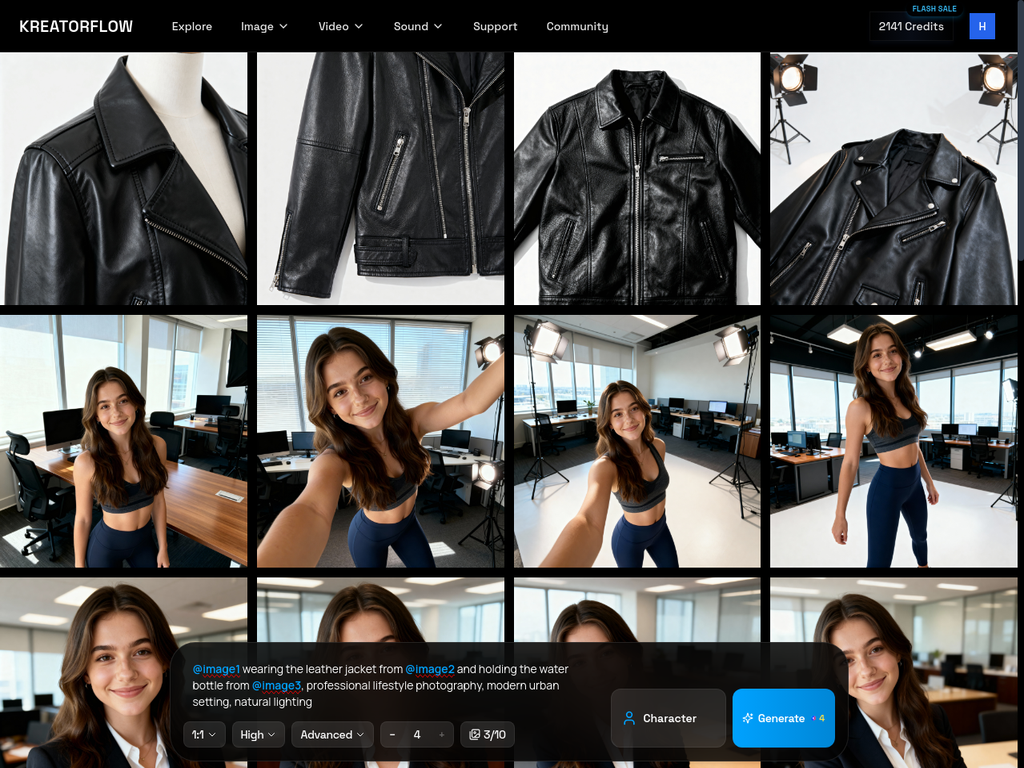
Prompt Used:
@image1 wearing the leather jacket from @image2 and holding the water bottle from @image3, professional lifestyle photography, modern urban setting, natural lighting
How the AI Interprets This:
- • @image1 → Extract the model's facial features, hair, and identity
- • @image2 → Extract the jacket's style, color, and design details
- • @image3 → Extract the water bottle appearance and integrate it
- • Combine all three → Create a cohesive lifestyle image
Step 3: Review Generated Results
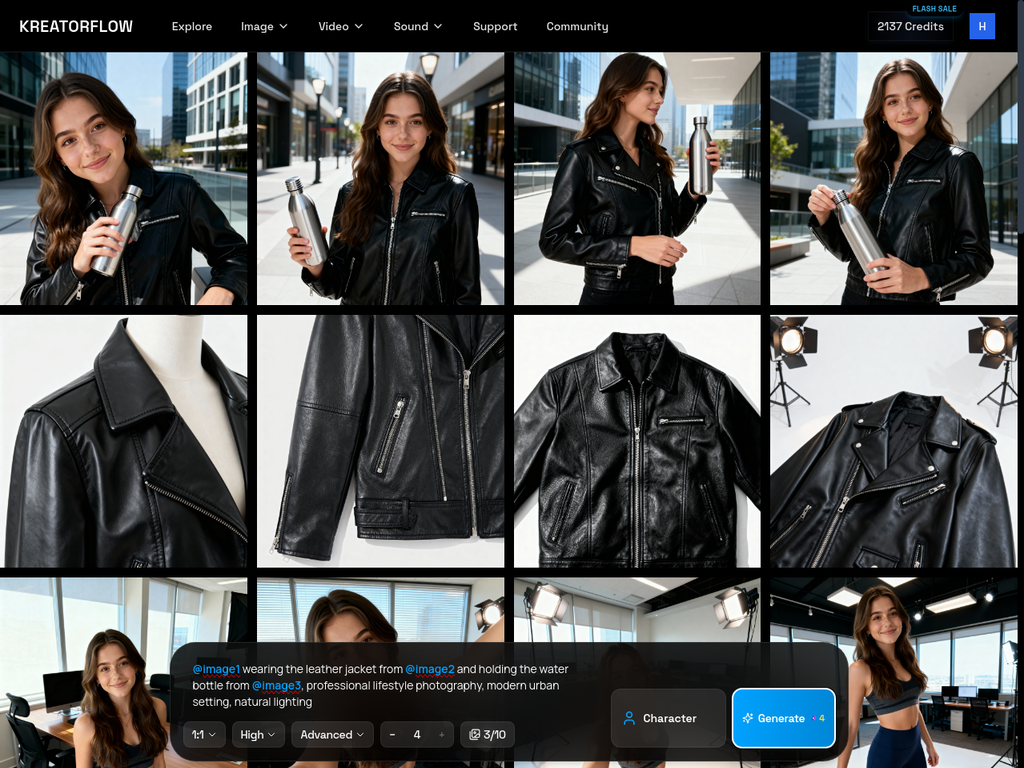
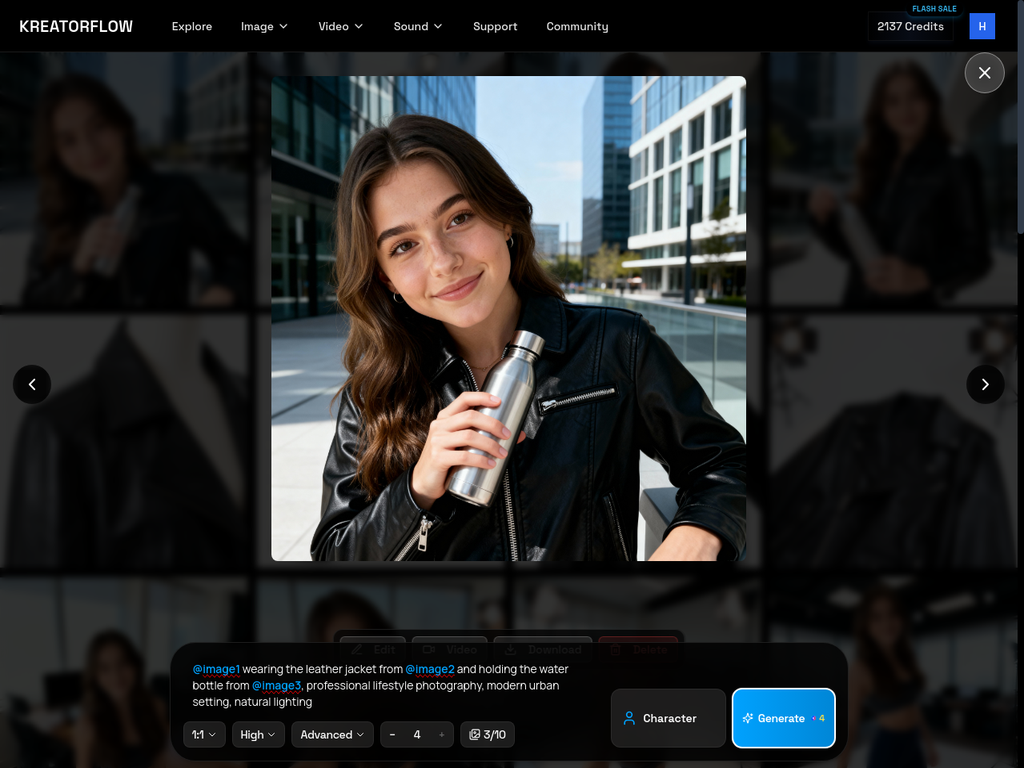
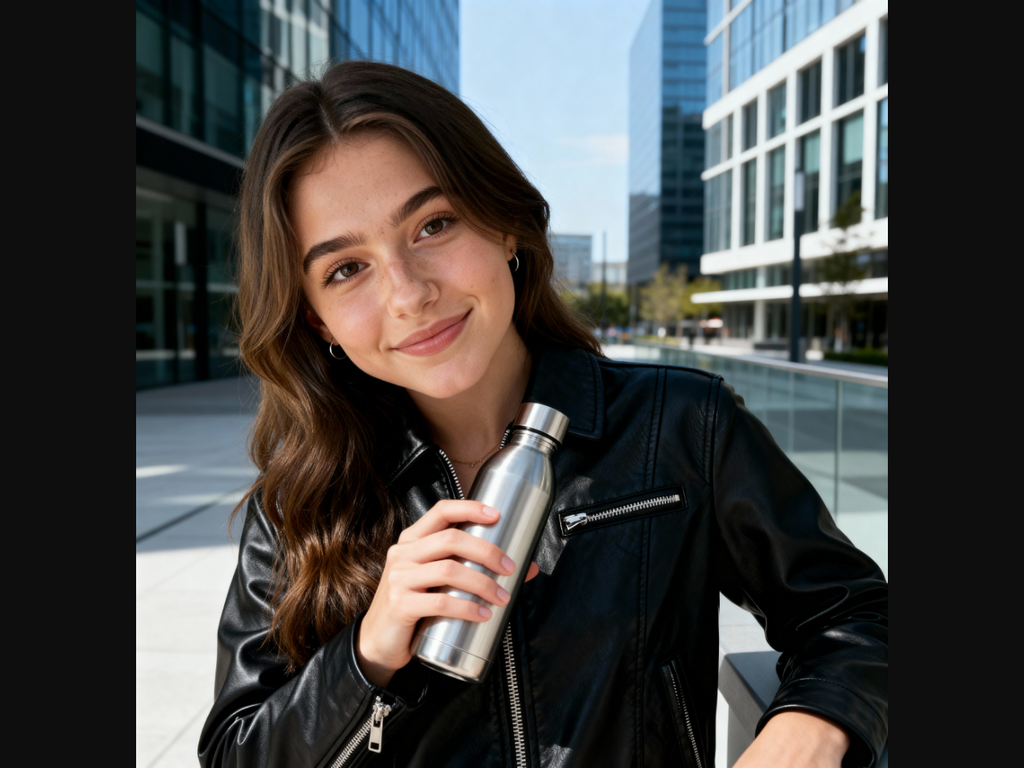
What Was Successfully Combined:
- Model (@image1): Same person with consistent facial features, hair, and appearance
- Clothing (@image2): Black leather jacket applied perfectly with accurate style and details
- Product (@image3): Stainless steel water bottle integrated naturally into the composition
- Cohesive Result: All three elements blended seamlessly in a professional urban lifestyle setting
Use Cases for Reference Images
Brand Mascots
Keep consistent characters across marketing materials
Product Variations
Show same product in different settings
Style Transfer
Maintain artistic style across multiple images
Character Development
Create consistent characters for storytelling
Model Consistency
Use the same model across different product photos
Tips for Using Reference Images:
- 1.Clear References: Use high-quality, clear reference images for best results
- 2.Multiple References: Combine up to 10 references for complex consistency needs
- 3.Reference Syntax: Always use @image1, @image2 format in your prompt
- 4.Describe Changes: Clearly describe what should change from the reference
- 5.Experiment: Try different reference combinations to find what works best
Ready to Master Image Generation?
Learn prompting best practices, advanced settings, and troubleshooting tips to get the most out of Seedream 4.0.