Understanding the Interface
The image generation interface consists of 7 key components that give you complete control over your image creation process.
Main Control Panel
This is the primary interface where you'll configure all your image generation settings:

1. Prompt Input Field
This is where you describe what you want to create. The more detailed and specific your description, the better the results.

Best Practices for Prompts:
- Be specific about subject, style, lighting, and composition
- Include photography terms like "professional product photography" or "studio lighting"
- Describe materials and textures ("polished marble," "soft velvet")
- Specify the mood or aesthetic ("minimalist," "dramatic," "cinematic")
2. Aspect Ratio Selector
Choose from 8 different aspect ratios to match your use case:
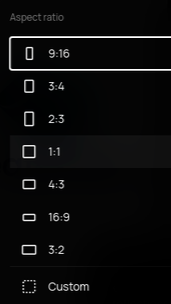
Complete Aspect Ratio Guide
| Aspect Ratio | Best For |
|---|---|
| 9:16 | Instagram Stories, TikTok, Mobile vertical content |
| 3:4 | Portrait photos, Social media posts |
| 2:3 | Traditional portrait photography |
| 1:1 | Instagram posts, Profile pictures, Square formats |
| 4:3 | Standard displays, Presentations |
| 16:9 | YouTube thumbnails, Widescreen displays, Banners |
| 3:2 | Professional photography, Print media |
| Custom | Define your own dimensions |
3. Quality Settings
Choose the quality level for your images:

Low Quality
Fast generation, good for testing prompts
Medium Quality
Balanced quality and speed
High Quality
Best results, recommended for final outputs
Important:
All quality levels cost 1 credit per image. Quality affects the detail and refinement, not the price!
4. Batch Size
Generate 1-10 images at once. Each image costs 1 credit:
Examples:
- • 1 image = 1 credit
- • 4 images = 4 credits
- • 10 images = 10 credits
5. Reference Images (0/10)
Upload up to 10 reference images to maintain character consistency, style, or specific elements across your generations.
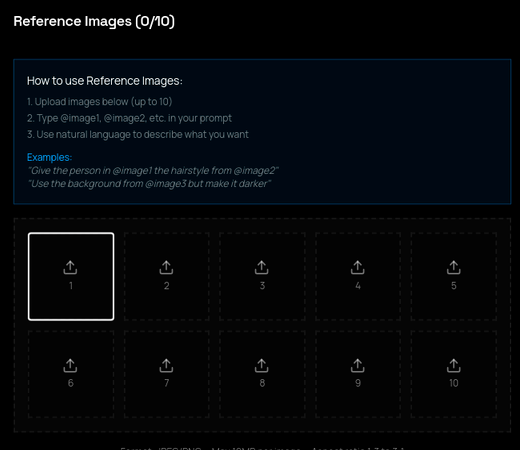
How to Use Reference Images:
- Upload images below (up to 10)
- Type @image1, @image2, etc. in your prompt
- Use natural language to describe what you want
Examples:
"Give the person in @image1 the hairstyle from @image2""Use the background from @image1 but make it darker"Format: JPEG/PNG | Max: 10MB per image | Aspect ratio: 1.5 to 3:1
Learn more about Reference Images6. Advanced Settings
Fine-tune your generation with advanced controls like Guidance Scale.
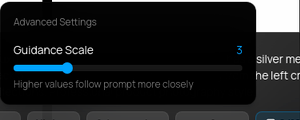
Guidance Scale (1-20)
Controls how closely the AI follows your prompt. Higher values follow prompts more strictly, lower values give the AI more creative freedom.
More creative freedom, unexpected results, artistic interpretation
Balanced between creativity and accuracy
Strict adherence to prompt, more predictable results
7. Character Button
Access pre-made character templates or save your own characters for consistent use.
AI Characters
The Character button gives you quick access to your saved character templates. You can create and save consistent characters with predefined settings, making it easy to generate images with the same character across multiple sessions.
View complete AI Characters documentationReady to Try It Out?
Now that you understand the interface, explore our tutorial examples to see these features in action.